Skip to main content


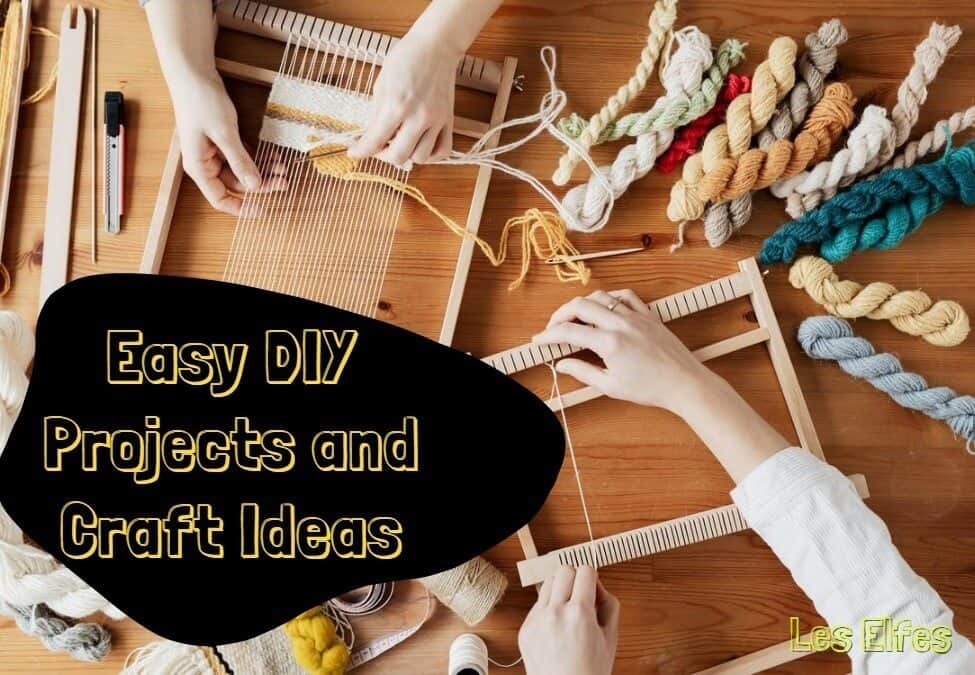
DIY projects do not have to be time-consuming, challenging, or costly. There are numerous creative DIY and cost-friendly crafting options you can execute with readily available materials. In this article, we shall discuss some of the easy craft ideas you can do with your kids.
Birdseed Wreath
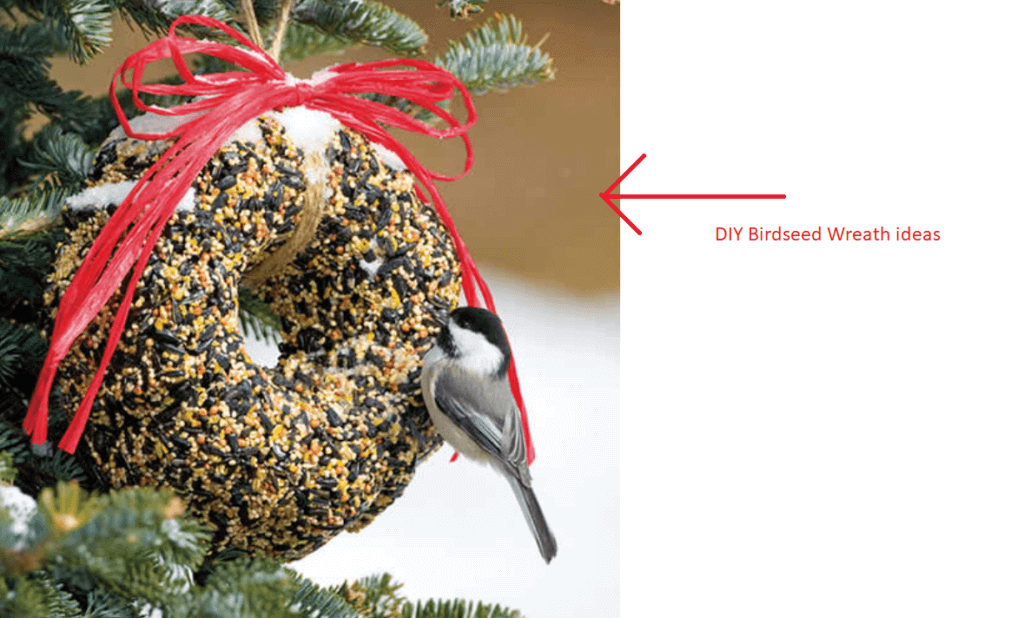
If you love birds, you can use this easy DIY birdseed wreath to feed them, especially during winter. Read the step guide below on how to make it.
Ingredients
- Suet
- Fine cheesecloth
- Baking dish or saucepan
- A measuring cup
- A Six cup Bundt cup
- Fresh cranberries
- Dried cranberries
- Wild birdseed
- Large plastic spoon
- Roasted unsalted peanuts
- A wide ribbon
Method
- Start by slicing one pound of suet into small cubes and render it in a saucepan until the fat is well melted.
- Use fine cheesecloth to strain the suet and let it harden at room temperature before melting and filtering it again. Measure one and a half cups of your melted suet and set it aside.
- Put your fresh cranberries at the bottom of the six cup Bundt pan in your preferred pattern
- Combine one cup each of peanuts and cranberries, and four cups of wild bird seed in a large bowl
- Add the melted suet to your dry ingredients and coat thoroughly with your hands, or using a large spoon
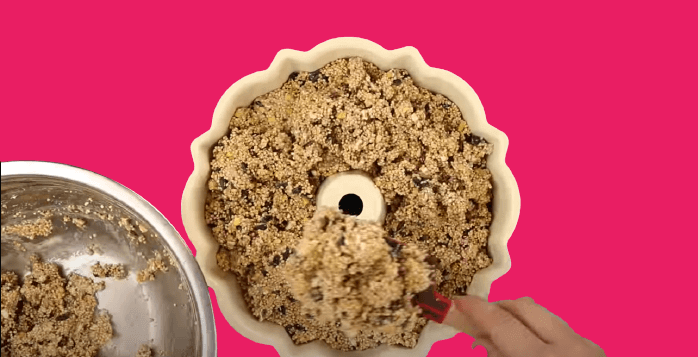
- Transfer your mixture to a pan and press it down one scoop at a time
- Leave the mixture in the fridge overnight to harden. You can also keep it in the freezer
- Once hard, take it out of the refrigerator and let it sit for around 10 minutes at room temperature before you unmold
- Use a wide ribbon to hang the wreath out in the garden. Ensure the temperatures are almost at freezing point to avoid spoiling or melting.
Citrus Fruit Serving Trays DIY Projects
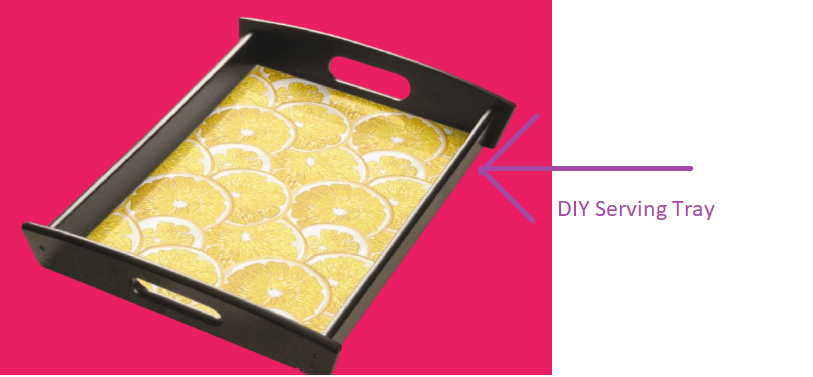
Citrus fruit serving trays are easy DIY projects that you can try to give your coffee table a complete makeover. You can use them to serve hot or cold refreshments during winter and summer days, respectively. These trays are not only bright, but they also give you a chance to experiment your creativity. Read on to understand how to create them.
Materials you will Need
- Acrylic paints
- Large eighteen-inch wood rounds
- A drill
- Screws and handles
- Paintbrushes
- Protective finish
Method
- With a circular saw, divide your 18-inch wood round into two equal parts. Remember, the wood round will be thick and heavy. You may want to use a wood cutting board to ease the cutting process. You can buy wood rounds at your nearest hardware store.
- Paint along the edge of the wood cutout and around half an inch on the inside. Be sure to paint along the flat borders as well.
- Paint a two-inch-wide half in the middle and use a pencil to draw lemon sections. Leave around half an inch between each part, the border, and the center.
- Paint across the lemon sections in white spray paint and use a light yellow color to paint inside the lemon segments
- Once the paint dries up, apply or spray a coat of protective finish on the entire tray to protect the painted area.
- Use an electric drill to fix handles.
Paper Chinese Money Plant Easy DIY Projects
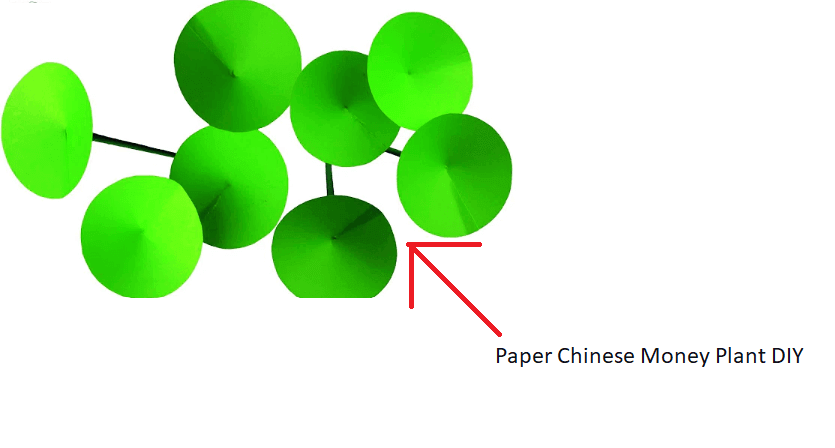
Paper Chinese Money Plant DIY ideas are ideal for you and your kids. If you are looking for classic crafts to complement your minimalist home decor, this should be your go-to option. What’s more, it is a simple project that beginners can easily complete, and it will easily complement your living space. For this project, you will need:
- Green paper
- Wire
- Wire cutter
- Paintbrush
- Glue stick
- Scissors
- A pot
- A hot glue gun
- Paint
- Pebbles
- Floral foam or Styrofoam
Method
- Cut circles of different sizes. These should be between one and a half to two inches.
- Make a slit in each circle. To achieve this, use your stick glue to build a hollow basin by gluing and overlapping one side of your ring to the other.
- Paint light green lines starting from the middle part of the leaf to set up the veins
- Bend a small curve on one side of the wire and use your glue gun to fix it at the back part of the leaf
- Fill your pot with Styrofoam or floral foam and arrange the stems inside.
- Once you have enough leaves cover the foam with Peebles
Yarn-wrapped Painted Jars
Yarn-wrapped Painted Jars are beautiful pieces that you can place on a countertop or along the entryway in your home. Here is how to create these simple DIY projects.
Materials you will Need
- Clean jars. Make sure they do not have any tags on them
- A tin of white spray but you can still use your preferred color
- String or yarn
- A cloth to cover your working surface
Method
- Wrap your string tightly around the jars in an overlapping and crisscrossing pattern and tie a knot.
- Place your jars upside down on a covered surface. Spray-paint them uniformly with two or more coats. Allow them to dry for around ten minutes in between the coats.
- Once they dry well, cut the string and unwrap.
- Put a tea light inside and use it as a decoration for your front door area.
Homemade Whiteboards
Whiteboards are ideal to use in offices, homes, and classrooms. You can use your whiteboard in different ways. For example, you can write down business plans, your daily schedule, school lessons, or even menu.
Your kids will enjoy scribbling and drawing on the whiteboard. While you can purchase an excellent whiteboard from Ikea, they can be quite costly, especially if you are looking for a large one. There are various DIY ideas you can use to make a whiteboard from home with just a few materials.
Paint Your Nightstand Using Stencil Texture
Many people overlook the nightstand when giving their bedrooms a makeover. Yet, upgrading your nightstand improves the appearance of your home. You only need a stencil and chalk paint to create this DIY project.
Artificial Granite Coasters
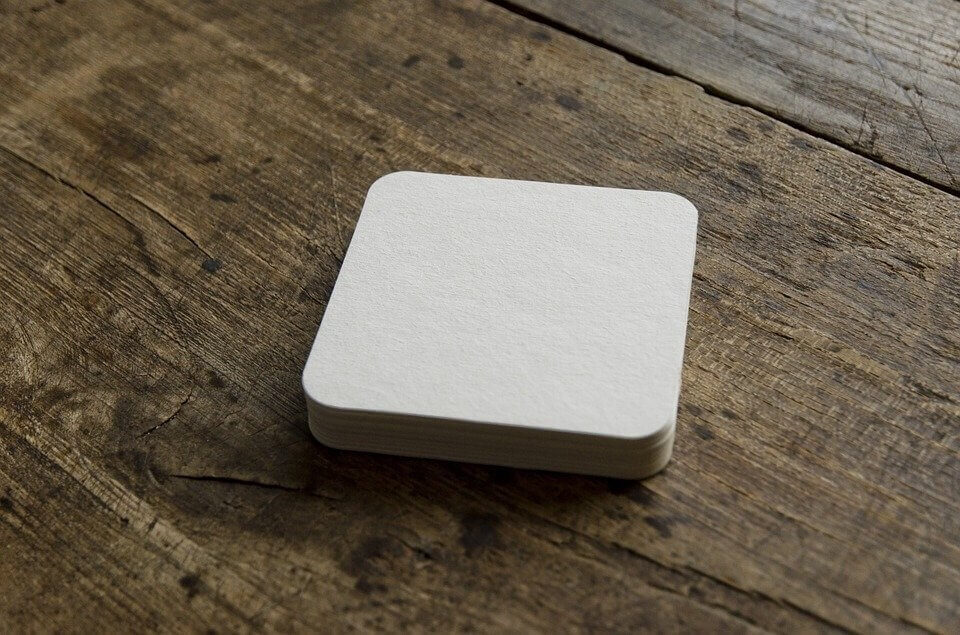
Coasters shield the surfaces where users are likely to place drinks. Sometimes you may place a coaster on top of your beverage to avoid contamination. Artificial granite coasters are great gift ideas to your loved ones. Read on for a guide on how to complete this DIY project.
Materials and Tools you will Need
- Oven-baked polymer clay
- Marble spray paint
- Granite spray paint
- Parchment paper
- Blue tape
- Acrylic paint
- Cardboard
- Paper plate
- Knife
- Rolling pin
- Baking tray
- Paintbrush
- Scissors
- Pen
Method
- Cut the parchment paper to create a working area from where you will roll your clay
- Warm your polymer clay in your hands to ease the rolling process
- Put an additional sheet of parchment paper on top of your piece of clay and roll slowly to create an even surface. The width should be approximately a quarter of an inch.
- With your knife, cut the outline of your coasters. Use the blue tape to set up straight edges and safeguard the segment of the coaster that you do not want to paint.
- Put your taped coasters on cardboard and spray them lightly until you achieve the desired outcome.
Chalkboard Wall Calendar DIY Projects
All you need for these wall calendar DIY projects is chalkboard paint and some tape. When applying the paint, begin at the center of the surface that you are painting and proceed outward. Brushes are ideal for small areas. However, if you are working in a large section, you may want to use a roller.
Maintain a steady stroke while overlapping any brush marks. Always clean drips as they occur to achieve a smooth finish. Remember, your surface should be clean before you can start the painting process.
If you are painting a ceramic or plastic board, wipe it clean with a damp cloth. Spruce up wooden surfaces using sandpaper to achieve a smooth finish.
Pallet Bench and Coffee Table Home Projects
If you want to create a good quality do it yourself pallet furniture, make sure the pallets you choose are of excellent quality. You can build this pallet bench and coffee table complete with shelving for additional storage space in simple steps.
Upcycle an old record cabinet
Do you have an old record cabinet sitting in your home and do not know how to upgrade it? You can Google some DIY ideas or use this easy refurbishing guide to give your record cabinet a new look.
Cassette Tape Wallet DIY Projects
Cassette tapes are no longer in use thanks to modern technology. But this does not stop you from enjoying some retro feel. There are numerous DIY projects you can execute with your old cassettes.
DIY Floral Board Wall Art
You do not have to break a bank to create beautiful wall art. If you do not like the look of your walls and want to transform them, then this simple flower wall art tutorial will ease the process.
DIY Chalk Paint Picture Frame
Before you can embark on this project, you want to create a picture frame that complements your home decor. For this DIY project, you will need:
- Old picture frames
- Sealing wax
- Chalky finish paint
- Paintbrush
- A clean rag
- Sanding block
Method
- Remove any artwork or glass from the frame
- Clean your frame thoroughly
- Prepare the paint and then apply the first coat
- Wipe any drips before applying another coat
- Rub off any excess dye with a sanding block
- Finish off with a wax sealant
Ease Key Identification with Nail Polish
Do you struggle with identifying keys from your bunch? If you do, then this simple DIY project is all you need. It is an easy DIY idea that your young kids can execute with little supervision. All you need for this project is different nail polish colors. Use two coats of polish for each key to complete your project.
Make Rustic Mason Jar Candle Sconces

If you want to achieve a rustic look in your home, these Mason jar candle sconces are your go-to project. You will need:
- Two pieces of upcycled wood
- A roll of natural twine
- Mason jar
- A votive candle
- Brown rice
- A votive candle holder
- A hanger
- Screw hooks
- Electrical tape
Method
- Tape the ends of one chain on your mason jar and leave approximately four inches of chain hanging from every side
- Use the natural twine to bind the lips of your jar tightly. You want to continue wrapping until you cover the entire tape
- Cut off the excess cord, and tuck at the end
- Pull the chain carefully to ensure it is secure
- On a flat surface, place one wood
- Screw one of the hooks in the wood approximately two inches from the boundary
- Pour your dry rice inside the mason jar before adding the candle and votive holder
- Fix the wood to the wall before hanging your mason jar on the hook
- Repeat the process for your remaining sconces, then light up the candles and enjoy your unique rustic look. You can even share a tweet of your work with your friends.
DIY Macrame Shelf
This macrame shelf is easy to make. It does not involve sewing or require the use of any tools, making it ideal for kids of different ages. For this project, you will need:
- Ten yards of a three by sixteen-inch three-string macrame rope
- A wood ring
- A 9 by a 15-inch wooden board with holes embossed in each corner
Build a Fire Pit
A fire pit comes in handy during the cold season. You can complete fire pit DIY projects with these easy steps.
DIY Peel-and-stick Backsplash
Peel and stick backlash wallpaper has become a popular product for DIY enthusiasts. Not only is it easy to install, but it is also affordable and available in various options. Read on to understand how to make it.
Materials you will Need
- Measuring tape
- Utility knife
- Scissors
- Straight edge ruler
- A wallpaper smoother
Method
- Wipe your walls clean to remove any grease or dirt with warm water and soap. Dry the walls well before applying the peel and stick backsplash wallpaper
- Measure your surface to establish the amount of wallpaper you need. Remove switch plates or outlet covers before placing the wallpaper.
- Go ahead and apply your wallpaper.
DIY Projects Save you Costs
Apart from saving you money, DIY projects involve upcycling, which protects the environment. Again, creating items yourself helps you outline your style, and this gives you a sense of satisfaction.
Register with us now to learn more DIY ideas.